
Introduction
This is not an advert. This is an account of our experience.
When we first moved into our house in 2021, the previous owner had a large 10-foot-by-16-foot shed in the corner of the garden. Great! We thought—plenty of storage space. The plastic windows had degraded to the point where you couldn’t see through them anymore, but they were still serviceable and let some light in.
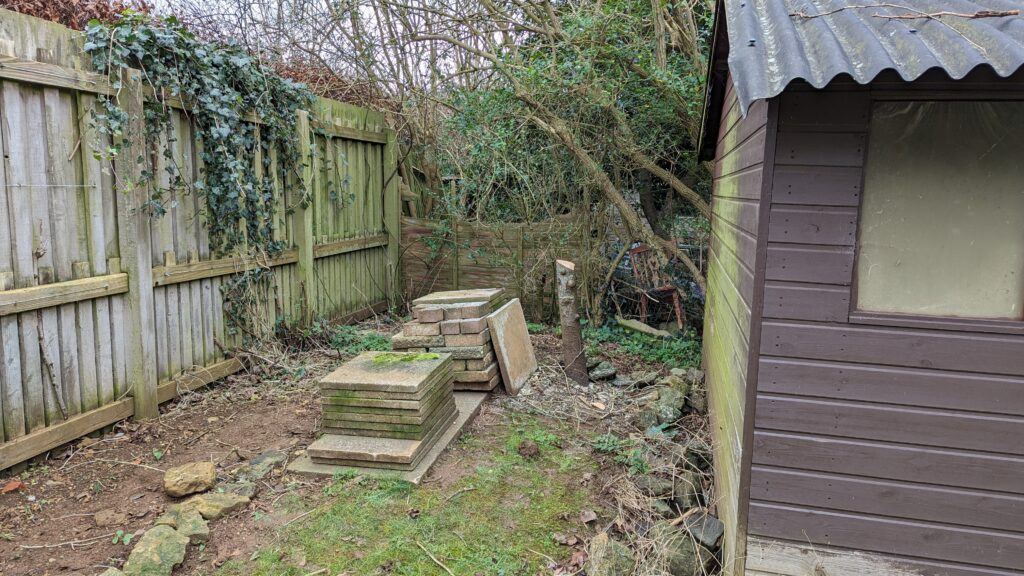
When planning the kitchen garden, we noticed the area behind the shed was raised about a foot or so above the bottom of the shed. Sandstone rocks had been used to retain the ground behind the shed, but over time, they had collapsed and were now resting against the back of the shed. So, I set about clearing the area—removing the stones and digging out the dirt.
Sadly, as I dug, I noticed the back of the shed was rotting away. At first, I thought it would be an easy repair job, but once I got to the far corner, I discovered the corner had gone entirely—the floor and corner post were rotted. So, a new shed was required!

The Search Begins
We decided to find a shed with the exact dimensions. I had considered having a small shed at the back of the space and a potting shed at the front, but in the end, we decided that another large shed would provide both storage and workshop space. So, another 10×16-footer it is!
We looked at several sheds, poring over websites and brochures, and even visited a few local garden centres. In the end, we chose the Tiger XL Heavyweight Workshop Shed from Tigersheds.com. We wanted a shed that would last, and with a 20-year guarantee, we felt it would provide both longevity and enough space for our needs.
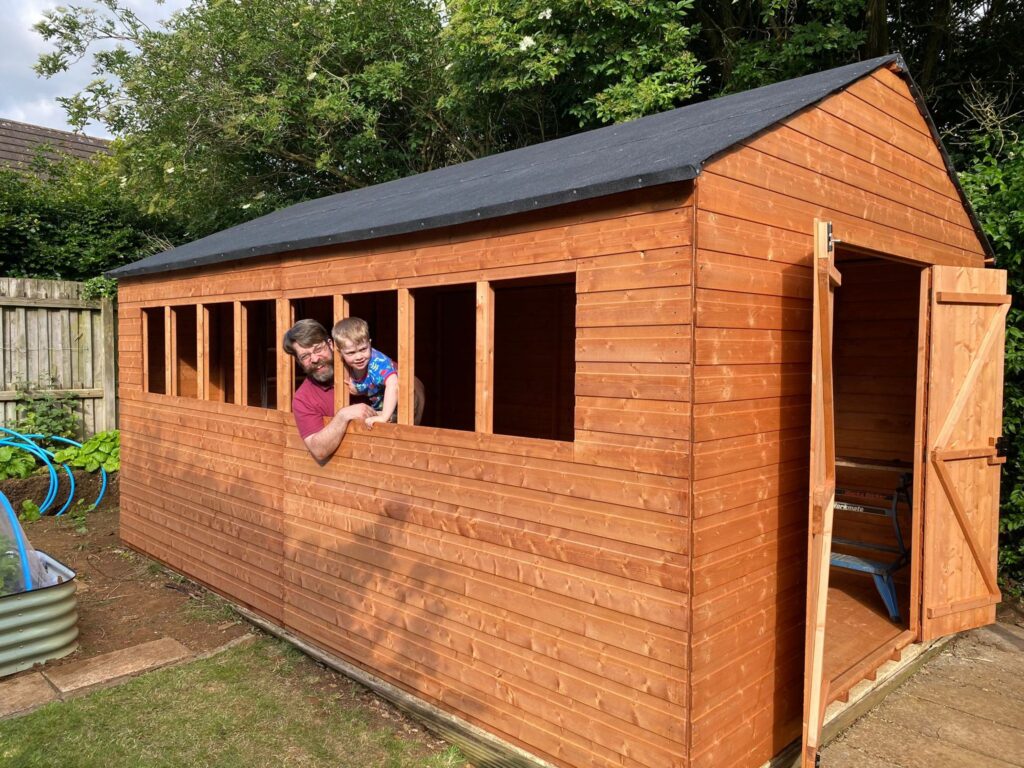
Ordering the shed was straightforward, and we were able to customise it in various ways. We didn’t want to make many changes—just added the glazing kit and opted for a clear wood preserver as we liked the natural colour. We may change that in the future. We also added a spare key and an extra door pull (as the shed has double doors) to the order.
We placed the order in April 2024 and arranged delivery for June. So, now it was time to prepare the area.
Preparation
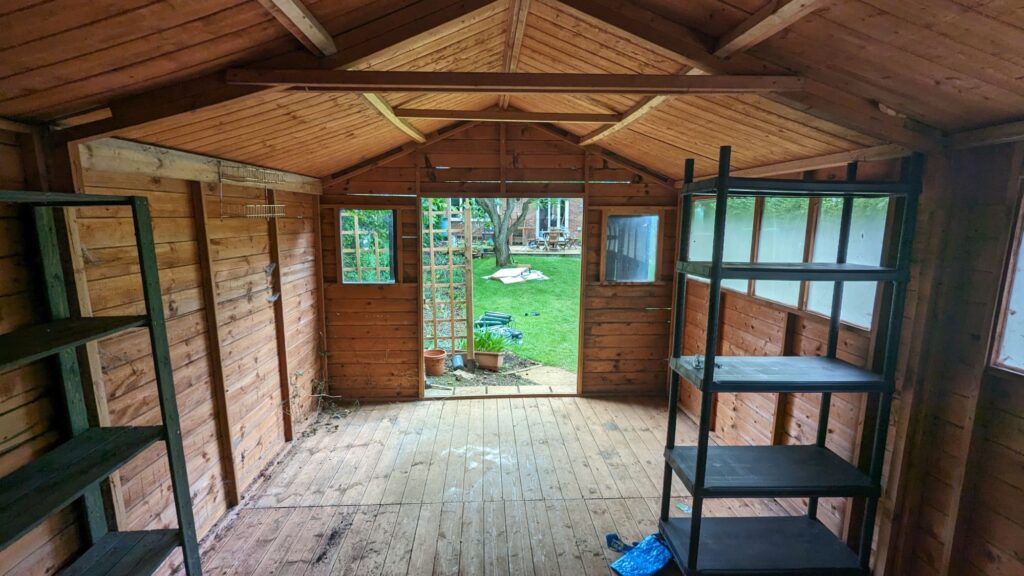
Over the next month or so, I began clearing out the old shed. This gave me the chance to finally sort through everything we had inherited from the previous owners and decide what to keep and what to take to the recycling centre or charity shop.
Once the shed was empty, the fun part began—demolishing it. The roof had deteriorated, and the previous owners had covered it with bitumen roof tiles. These had to be removed and disposed of before the rest of the shed could come down. It was fun using the sledgehammer!

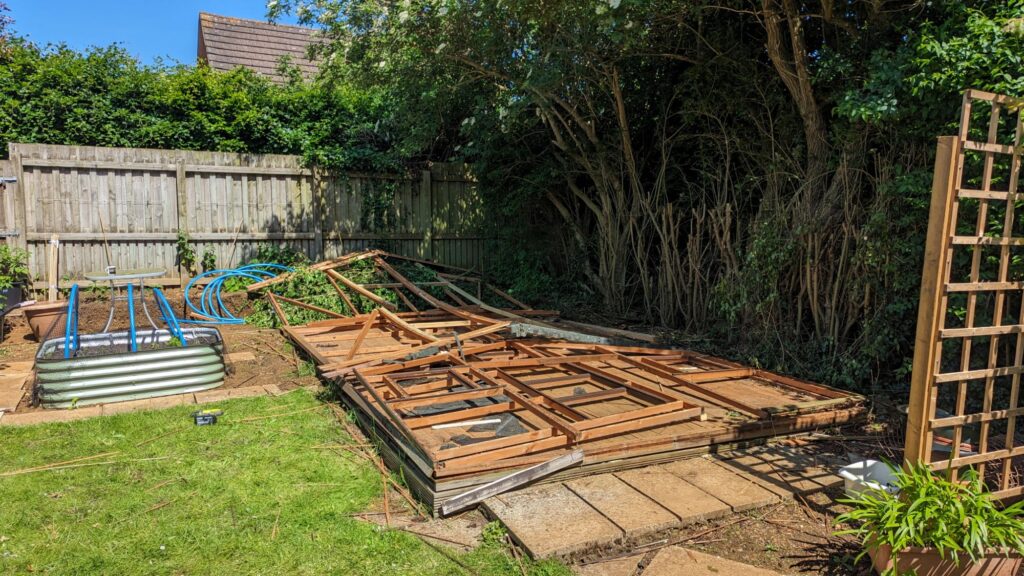
Our local recycling centre allows a single DIY load of building materials every couple of weeks for free, then charges for additional loads. Rather than waiting, we paid around £20 to dispose of the old shed over three days, filling the car with as much as possible each time. I cut the wood into smaller sections, which helped reduce the number of trips and may have also kept the cost down.
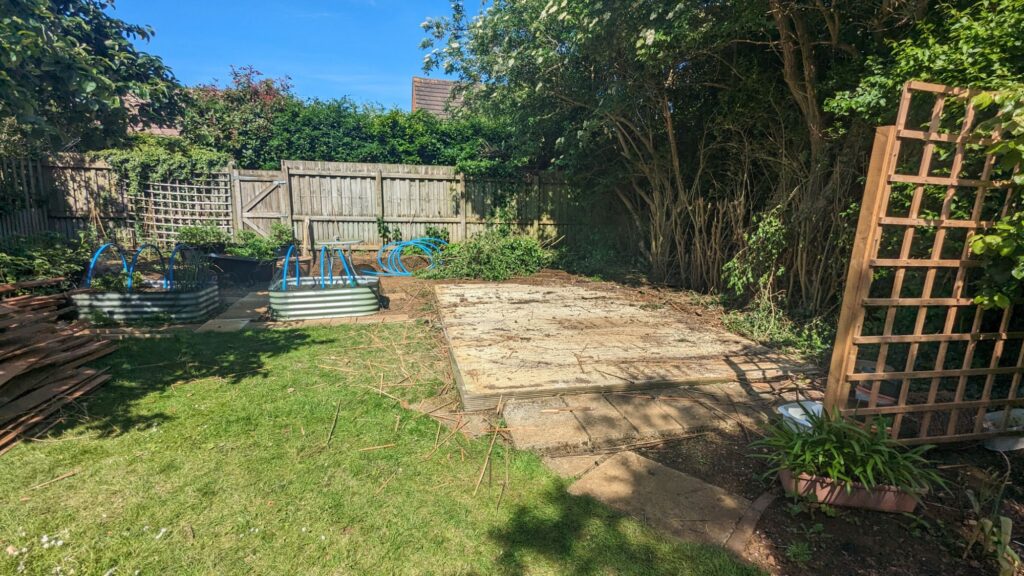
The concrete pad underneath was still in good condition, and after a good sweep, it was ready for the new shed.
The shed arrives
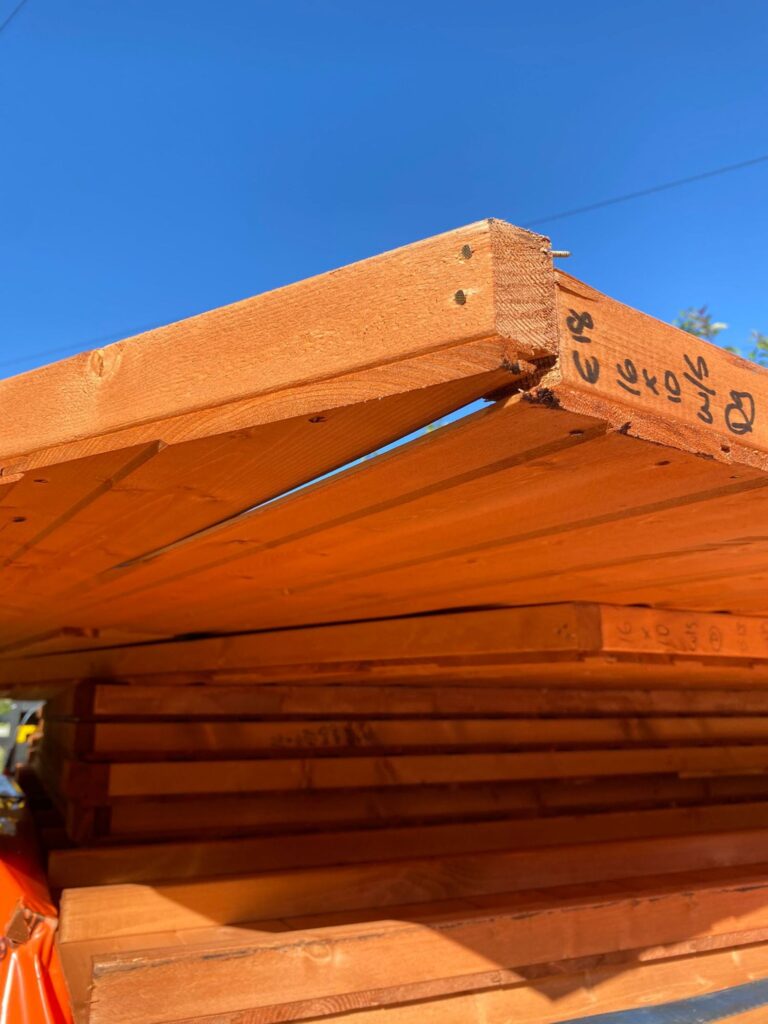
The new shed arrived a couple of weeks later while I was at work, so Michelle managed the delivery. She let me know it had arrived safely, but there were a couple of issues: one corner of the frame wasn’t flush, and a section of tongue on one of the floor panels had broken during transport.
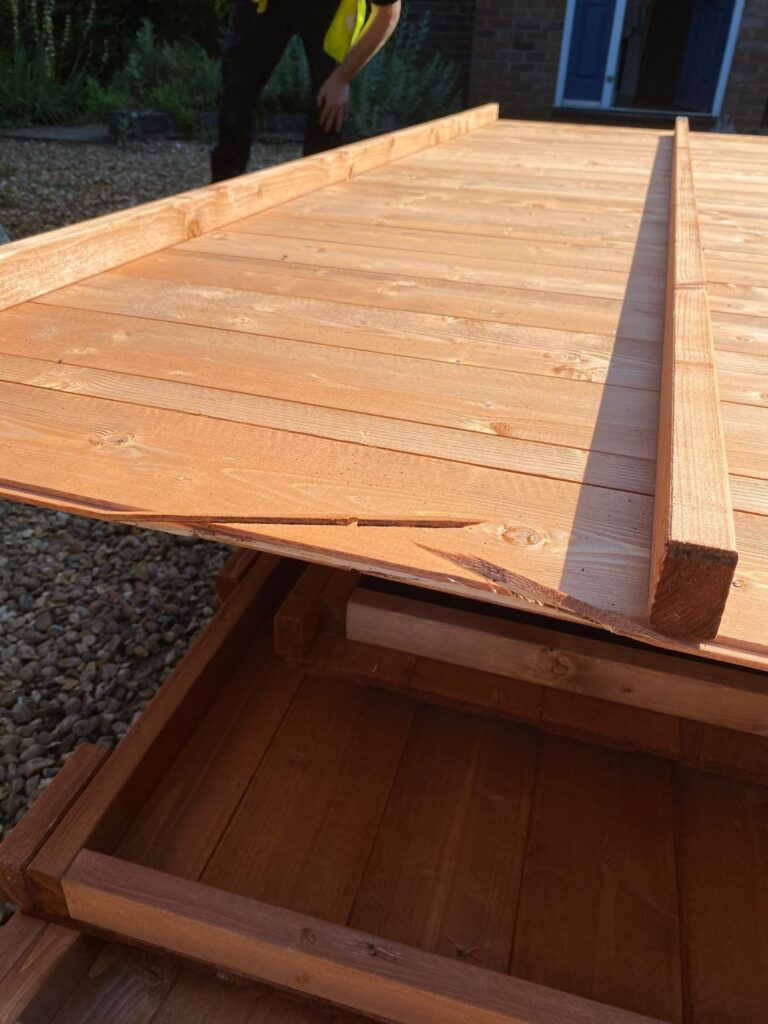
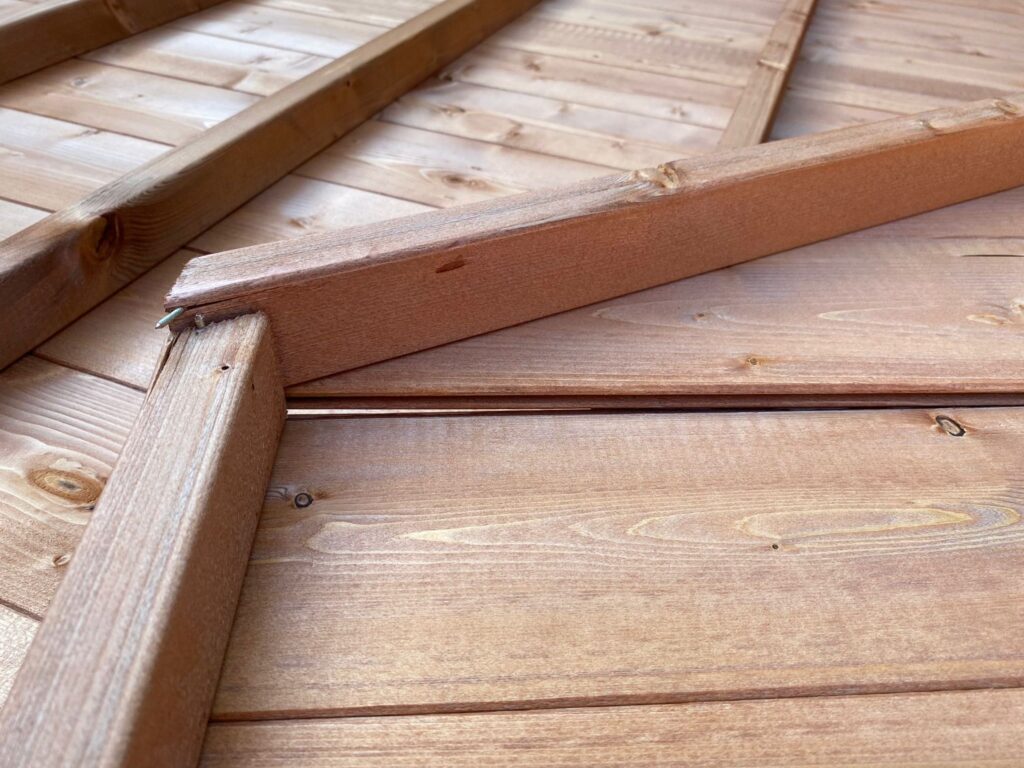
When I got home, I was able to resolve the first issue by gently lifting the panel into place so that it sat properly in the tongue and groove, then adding some nails to secure it in position. The second issue couldn’t be fixed, but thankfully, it shouldn’t cause too much of a problem.
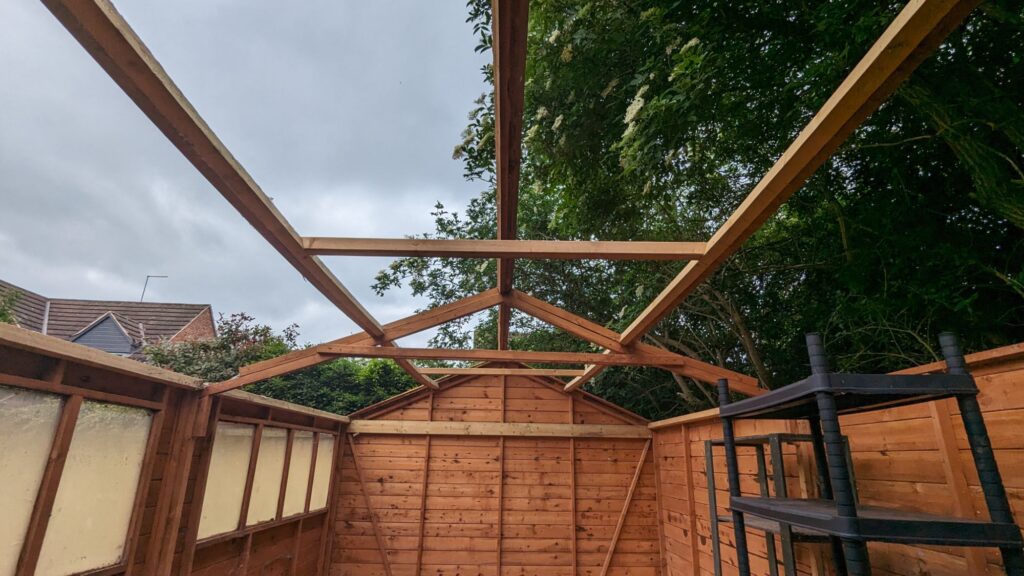
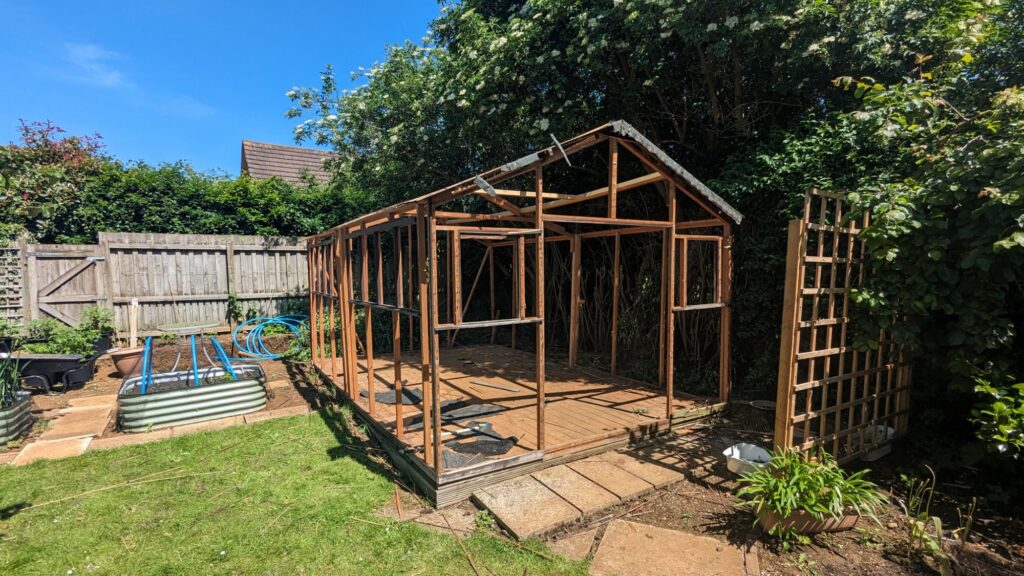
Putting Up the Shed
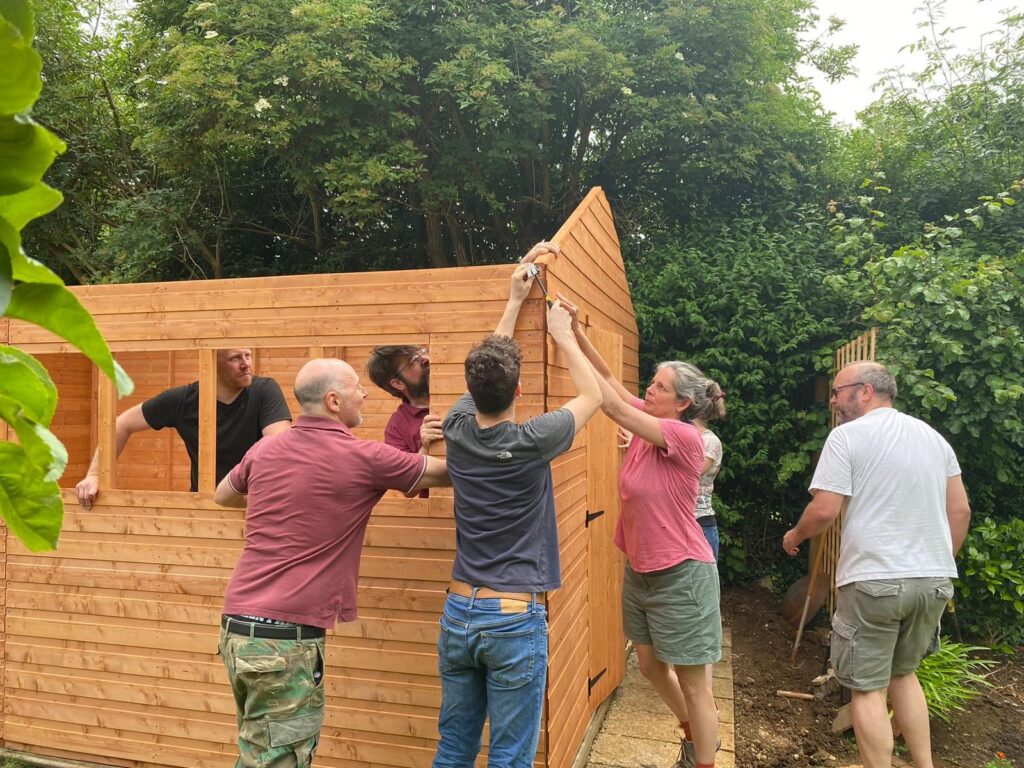
Putting up a shed of this size on your own is no easy task. Michelle put out a call for volunteers and arranged an “ol’ fashioned barn raising,” inspired by the barn-raising scene from Seven Brides for Seven Brothers—minus the fistfight at the end!
The day before, I cooked a big pot of chilli, and Michelle prepared baked potatoes, salad, and, of course, some beer and wine for later. We were ready to raise the shed!
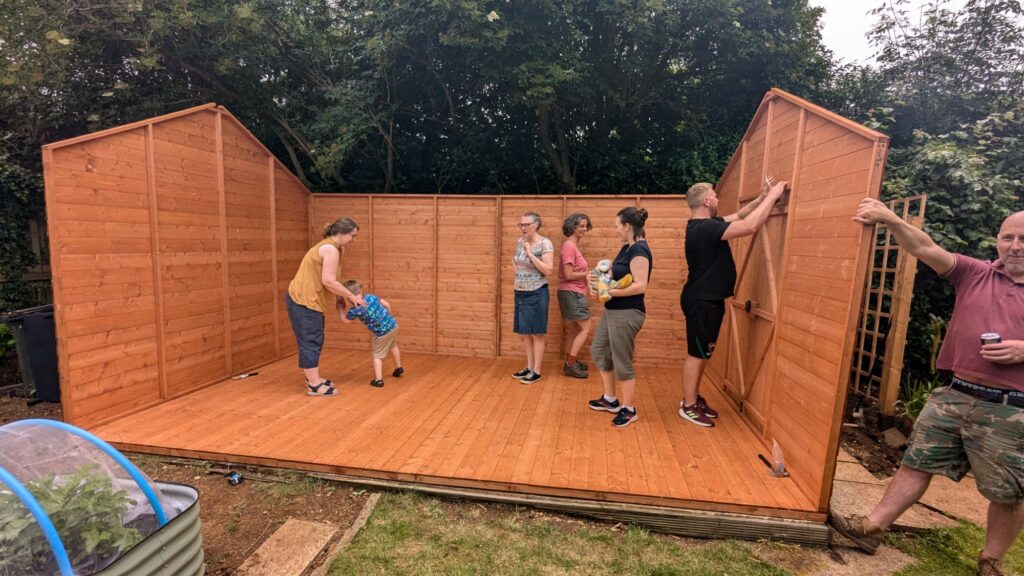
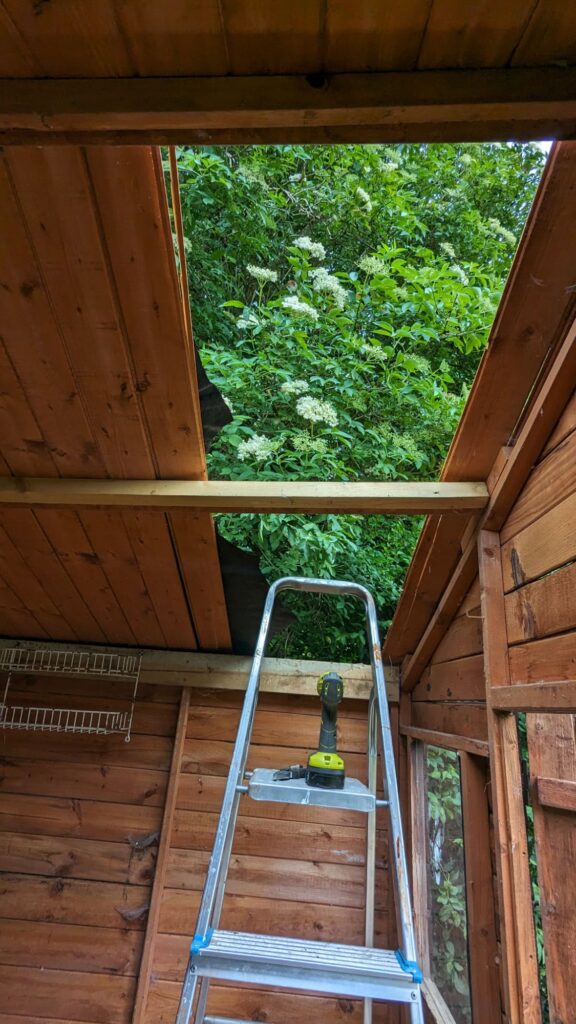
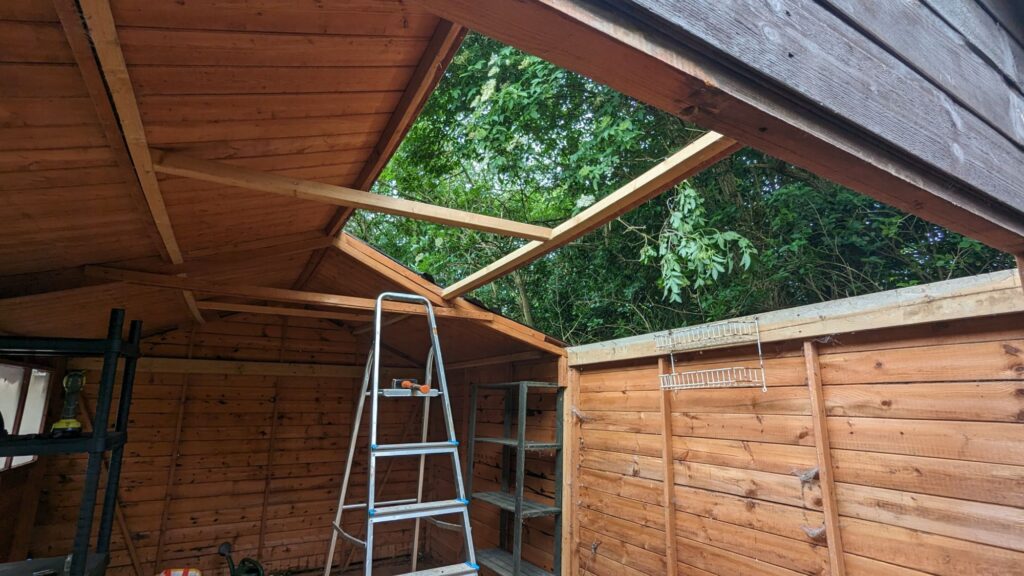
Tiger Sheds’ instructions weren’t immediately apparent, but fortunately, we found a helpful video on their YouTube channel that guided us through the process. Slowly but surely, the shed began to take shape. With more precise instructions, it would have gone up faster, but we managed to get the floor and walls up, pausing for a quick dance, then tackled the roof and the joys of adding the felt. On a hot day, that became a very sweaty job!
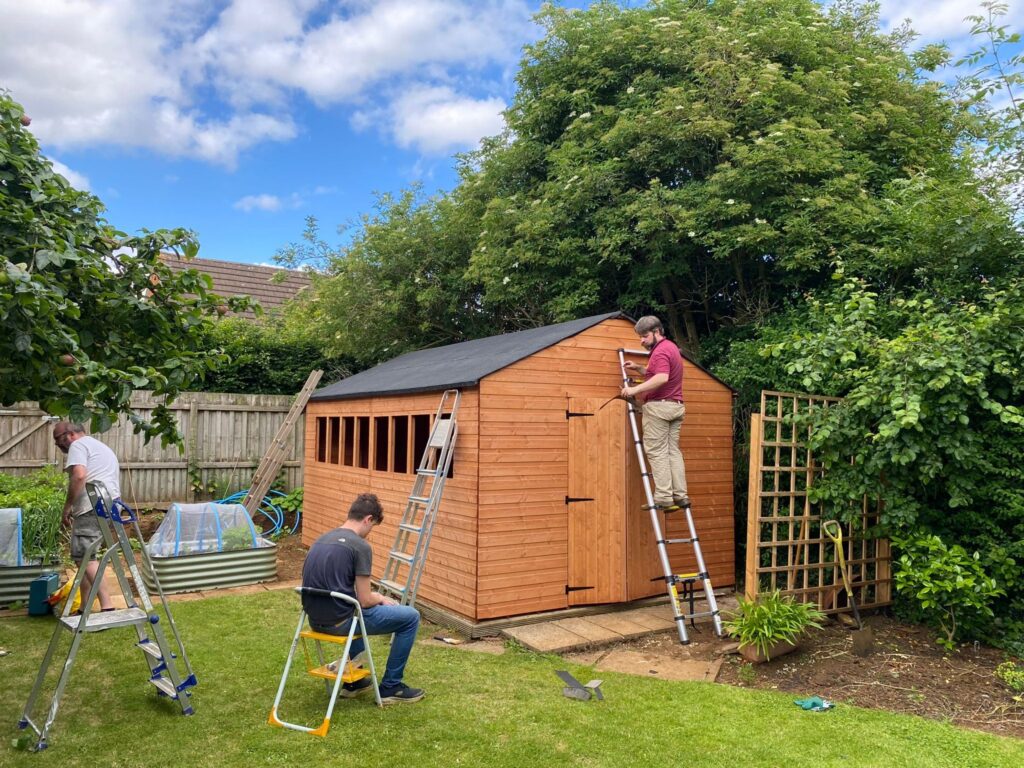
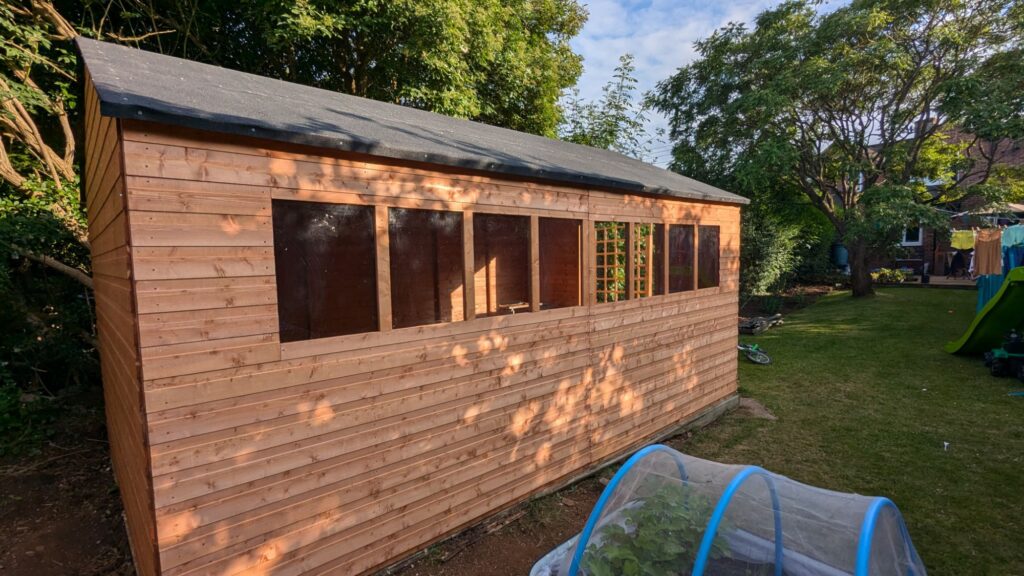
By the end of the day, all that remained was adding the windows and trim, which we completed over the next few evenings.
By the end of the week, we had finished the job and even managed to get a coat of preservative on the walls. Finally, we could start moving everything—tools and shed items—that we had been storing in the house back where it belonged.
Conclusion
The process of ordering the shed from Tiger was very smooth. While they could have taken a bit more care checking the parts before shipping, the shed itself is solid and well-constructed. It’s been up nearly a year now, and we’re pleased with it.
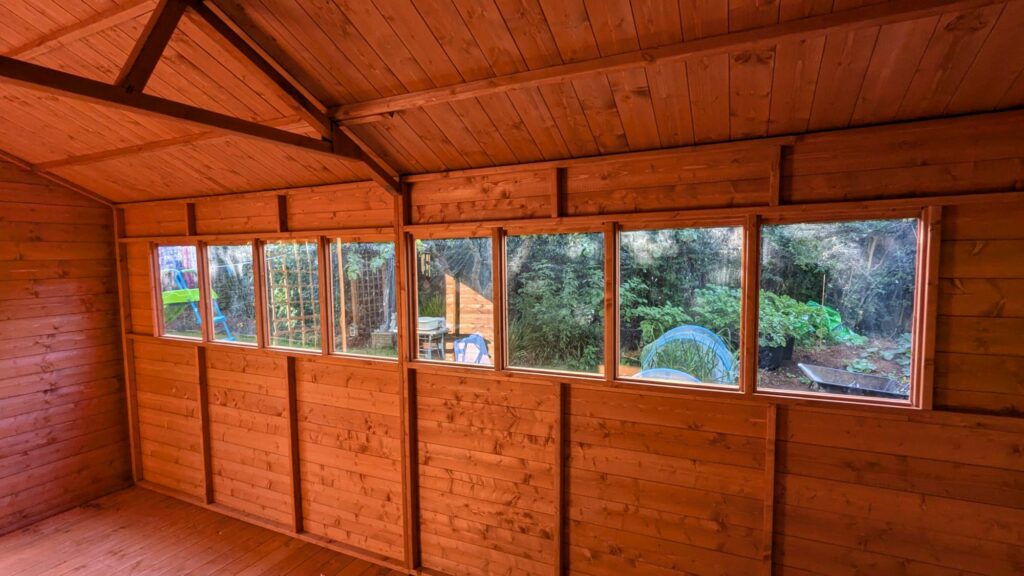
We chose glass windows instead of styrene so we wouldn’t have to replace them every few years. I’m glad we did—the view from the shed into the garden is lovely. I haven’t added the metal mesh window protectors, but once Kit starts kicking balls around the back garden, I might wish I had!
Everyone enjoyed the shed-raising day—it was a great way to get people together and took some of the chore out of it.
We’re still working on shelving and storage inside the shed, so it’s a bit messy for now. But I’ve added a new potting table, and I’ve been making good use of it this season. It’s right in front of the window, so I get a nice view over the garden as I work.